EN
Maven - install Apache Maven on Windows 10
14
points
To install Apache Maven on Windows it is necessary to do following steps:
1. Check if JDK/JVM is installed on your operating system
- Open bash or windows commander (cmd) and run following command:
Output:java -version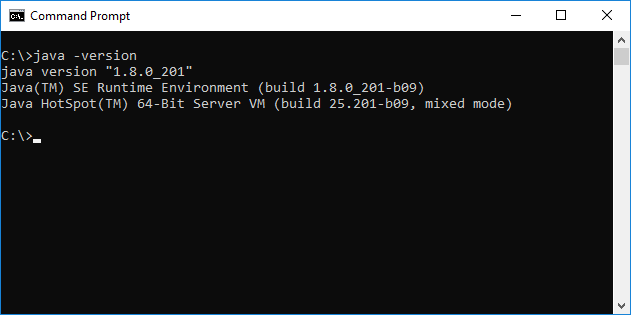
Checking java version with Windows Commander -
It is possible to check existance of JDK directory:
C:\Program Files\Java\jdk...Screenshot:
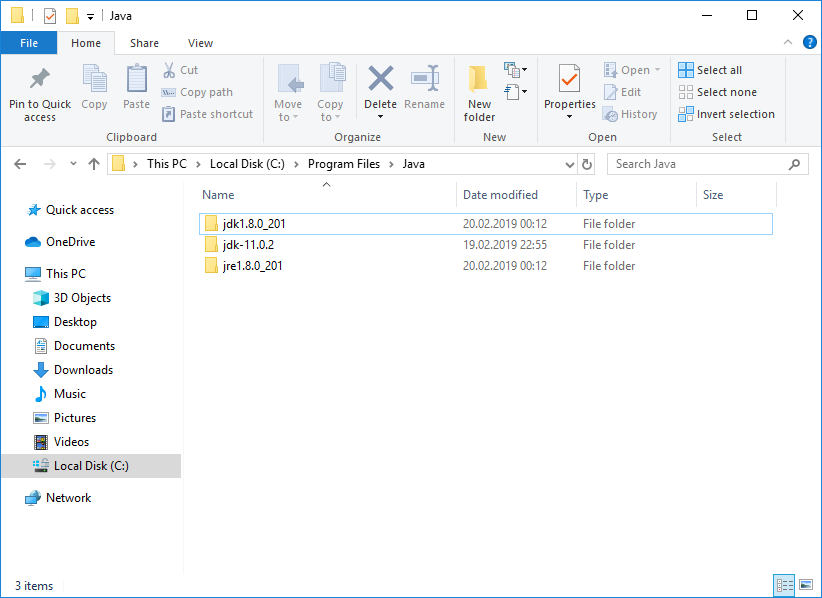
Default JRE and JDK location on Microsoft Windows -
If JRE or JDK is installed the path of java should be added to environment variables.
Screenshot: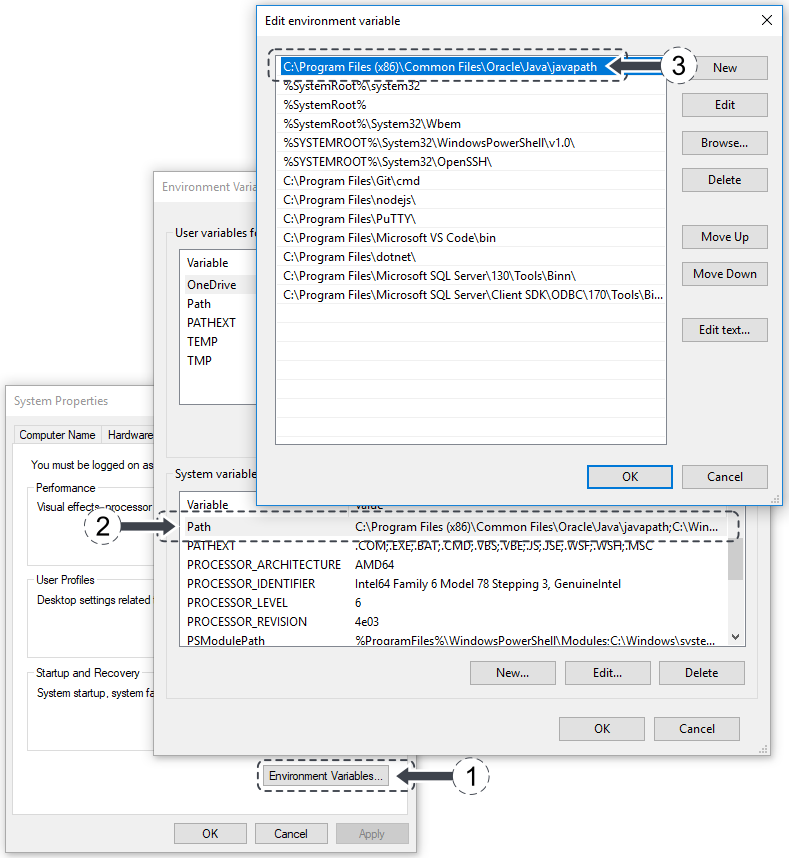
Java path in Environment Variables.
2. Download Apache Maven
- Go to official Apache Maven webpage: http://maven.apache.org
- Go to Download subpage (or use direct link: http://maven.apache.org/download.cgi)
- Download Binary zip archive or Binary tar.gz archive
Screenshot: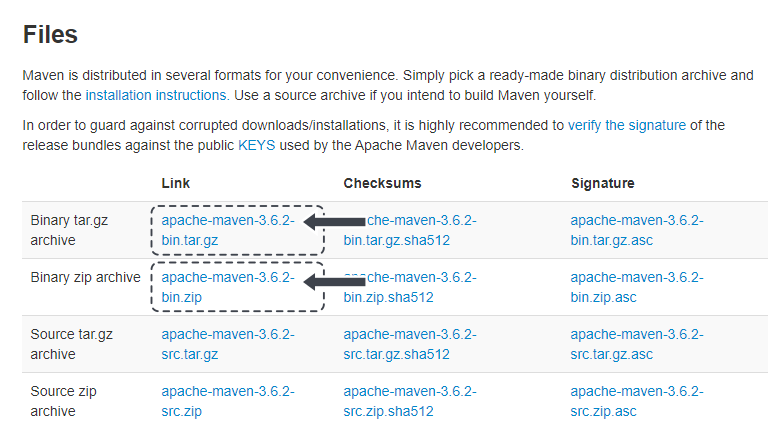
List of Apache Maven files to download.
3. Extract Apache Mavent archive (description for newbies)
- Use right click on archive file and extract it with your favourite program:
- 7-Zip
- WinZip
- WinRar
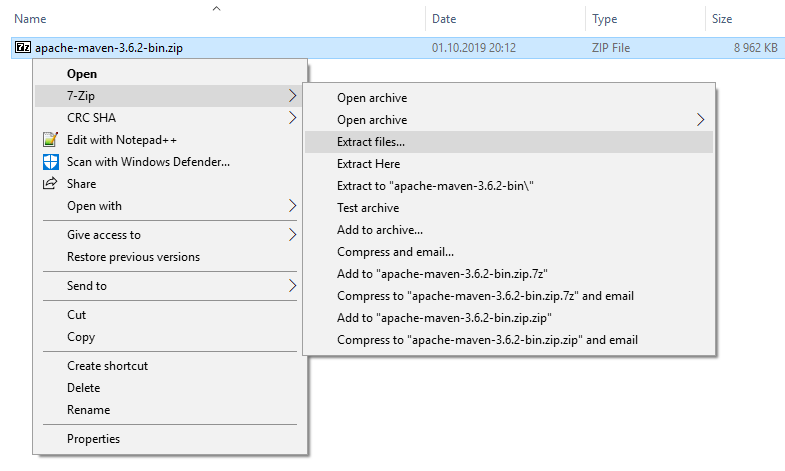
- After extracting "apache-maven-3.6.2" directory should appear (3.6.2 is depended of downloaded version in previous step).
- Move "apache-maven-3.6.2" to "C:\Program Files\" directory.
Note: extract operation has been splitted to steps because of necessary administrator permissions for move directory operation.
4. Add M2_HOME variable to environment
- Open with right button context menu for This PC (previously My Computer).
- Open Properties.
Screenshot: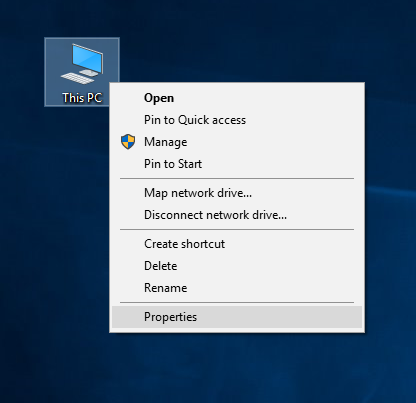
This PC -> Properties - Open Advanced system settings.
- Click Environment Variables... button.
- Click New... button for System variables.
- Create
M2_HOMEvariable with value "C:\Program Files\apache-maven-3.6.2".
Screenshot: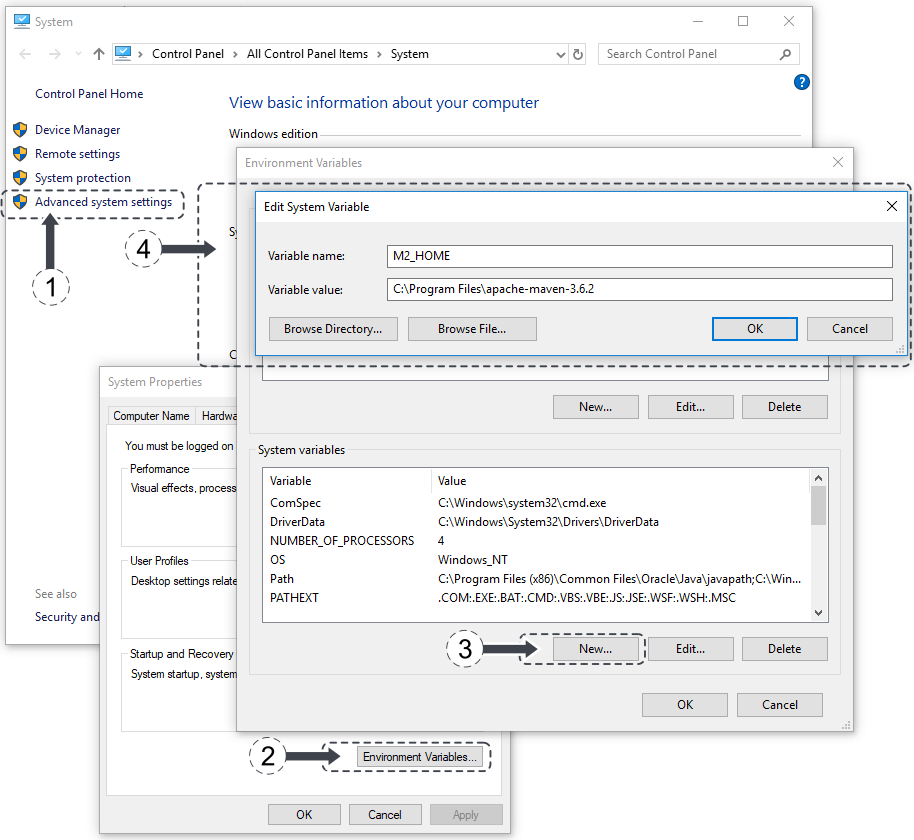
Adding M2_HOME variable to environment variables on Windows 10. - Add value "C:\Program Files\apache-maven-3.6.2\bin" path to Path variable for System variables - do not forget to append "\bin" at the end of path.
Screenshot: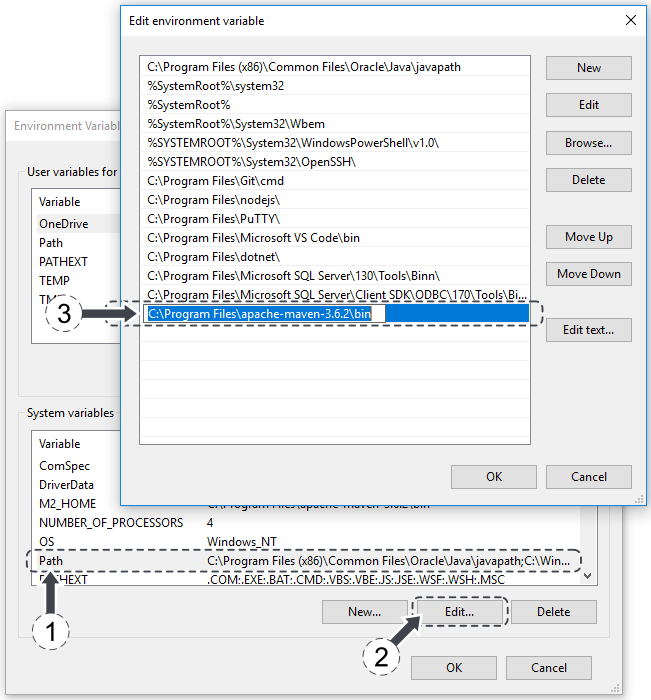
Adding Apache Maven path to environment variables on Windows 10.
5. Test if Apache Maven is working
- Open Windows Commander (press windows key + r key, type cmd and press enter key).
Bash for Windows can be used too (install and run instrucion here).
Screenshot: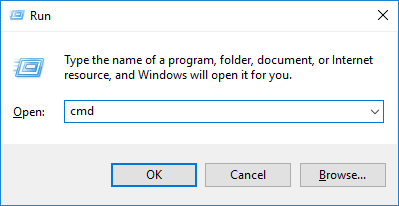
Run window with cmd program name. - Test Apache Maven with following way:
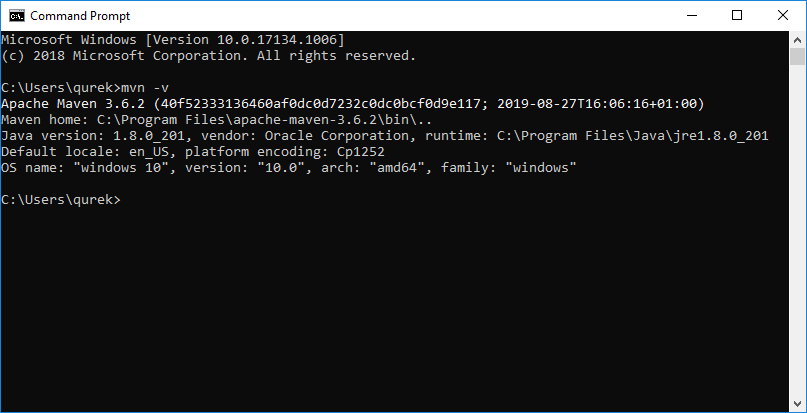
mvn -v
Output:
