VS Code - create SCSS / SASS project with Live Sass Compiler
In this article, we would like to show you how to create project with Live Sass Compiler for HTML web page.
1. Create project
Create project with the following structure:
/project_directory/
 ├─ index.html
 └─ style.scss
Example file content
index.html
<!DOCTYPE html>
<html>
<head>
    <link rel="stylesheet" href="style.css">
</head>
<body>
    <div>Hello World!</div>
</body>
</html>
style.scss
$bg-main-color: yellow;

body {
    background: $bg-main-color;
}
2. Install sass
Open Terminal in your project and install sass globally:
npm install -g sass
Or use the following article to install Sass locally: SCSS / SASS - local installation
Note:
If you are looking another way to install sass, go the the following page: Sass: Install Sass.
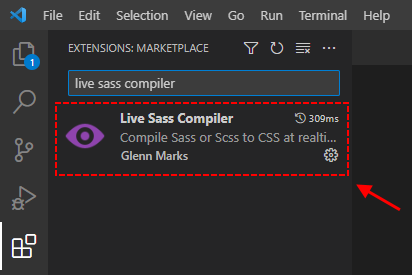
3. Install Live Sass Compiler
Go to the Extensions tab (Ctrl + Shift + X), search and install Live Sass Compiler.
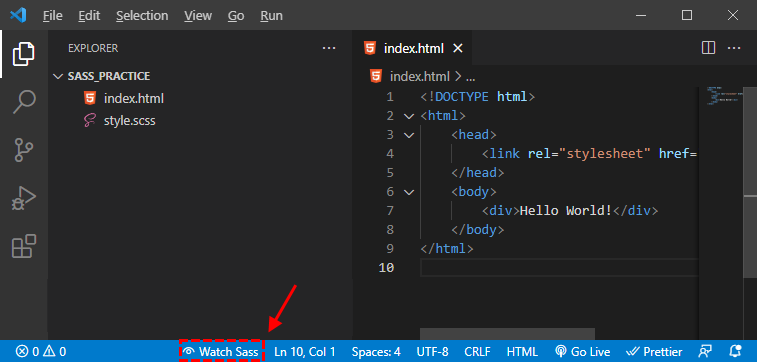
4. VS Code - Run Live Sass Compiler
Once the Live Sass Compiler installation is complete, you will be able to run it using Watch Sass button from the bar at the bottom of the VS Code. This will compile all the .scss files into the .css files that you can later use in your project (as we did in <link> element in the HTML template above - href="style.css").
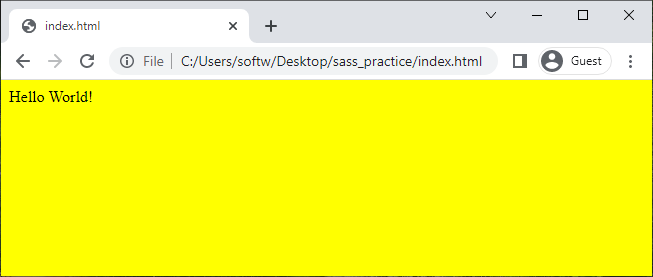
5. Result
Now, we can see that the variable from style.scss file has been successfully compiled into style.css file:
body {
  background: yellow;
}
and when you open the index.html file, you will see the following result: